Sunday, November 27, 2016

Week 7 - UVs and simple texturing

This week I touched up on the car model a bit, fixing the issues I had with it instead of just making it all over again which would have been easier. But, in an effort to learn the tools better, I figured fixing it would be the best approach.


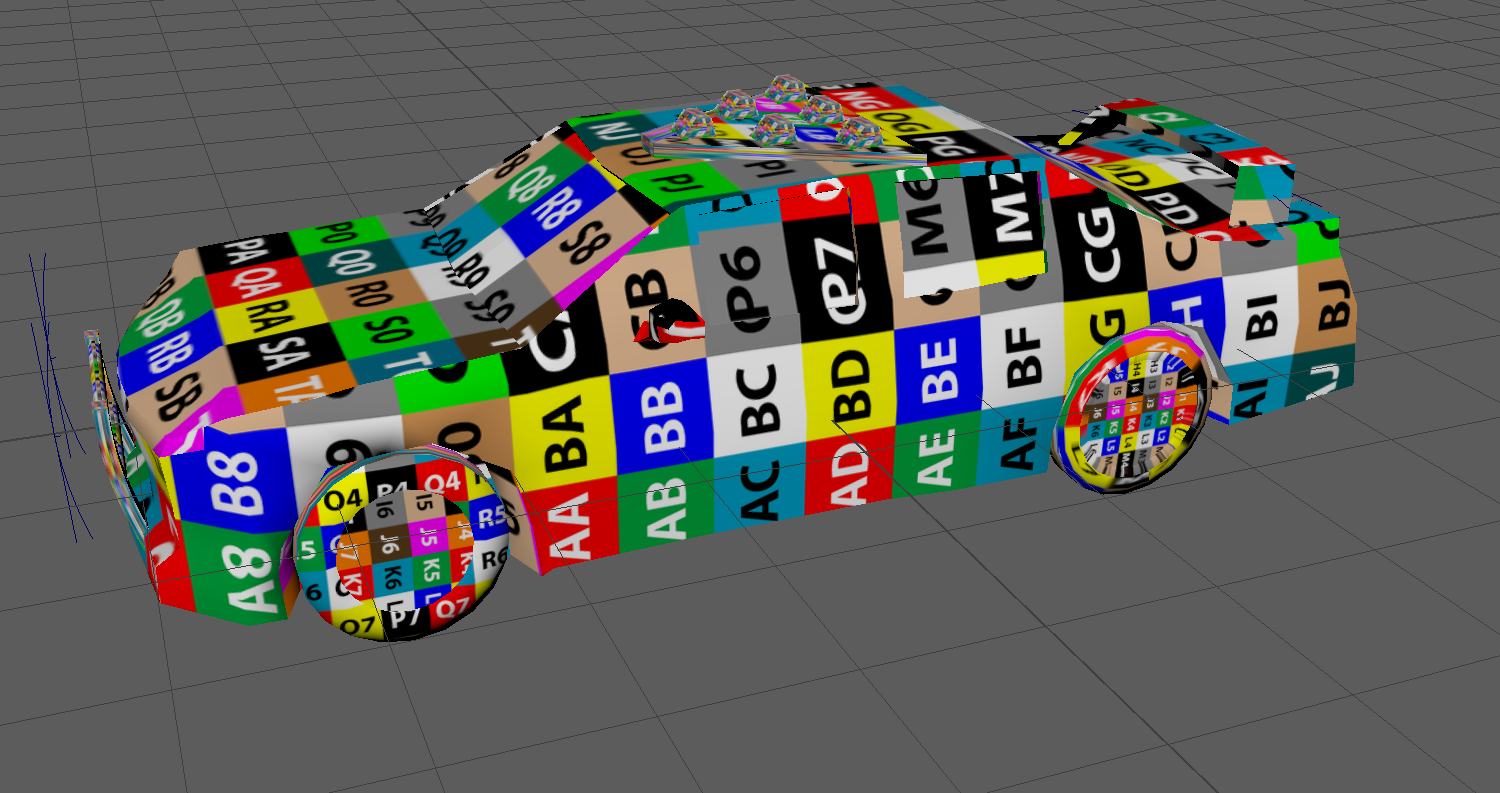
One thing I really got to practice was removing faces and sewing together vertexes so the area looked right again. But after this was done, I went on to do the extra parts to make my car something different. I went for one of the police car references and therefore made a bumper thing for the front and the lights for the top.


 the UVing which didn't make too much sense to me with the tutorials provided. I didn't understand what was being explained in terms of why we were stitching the UVs together and why resizing them to the UV mapping texture as it didn't seem like that overall mattered for when doing the simple color texture. Regardless I tried to do some of it, and it did end up looking alright once textured.


Though, I'm sure I have a lot to learn in terms of UVs and how they work so hopefully that will be explained during next class session.


Sunday, November 20, 2016

Asssignment 6 - modelling a car

For this week I got more intimate with Maya. Following a set of videos I managed to set up reference pictures for what kind of car I was going to model which allowed me to much more easily change up the shape of a cube so it matched the general shape of the car in question.

I took the picture of the car and cut it up into its separate components so I could easily model the cube.


Once images were set up, it was all a matter of pulling vertices until I had the general shape. Keeping this thing under 3k tries was very difficult and if I could have gone above it, I would have made a lot more details and done some things differently. But at least with making this, I learned a lot of new tools to help make models. I got more familiar with shaping a cube like it was made of clay, and I got to experiment with reducing faces, merging vertices, and duplicating half a car into a full car.


Sunday, November 13, 2016

Week 5 Assignment - Make it Pretty


For this week all I really focused on was prettying up my level and changing the layout of the challenges to fit the new assets I could use. Besides this, I only added 2 more mechanical things to the world. The first is a blueprint that counts down time and ends the level if you don't finish on time, and the second one is a victory screen if you manage finish the level. I also added some ambient sounds, music, and sound effects.


Sunday, November 6, 2016

Fourth Assignement - Only Mechanics


For this level I ignored almost all sense of aesthetics and just focused on what I could make with blueprints and tested them out on the level. Everything is more a proof of concept rather than what the actual thing will be. Once I start implementing aesthetics, a lot of the setup for each area of the level will change and when they do, I can know for certain how I want things to be set up.

So I started as per usual with figuring out a general setting and theme for it. For this one, I went with heavy platforming and wanted it to take place inside a volcano.


After getting the basic idea of where I wanted things to be and what I wanted to happen in each area, I went ham with figuring out blueprints on how to make what I wanted.

I created two keys that the player knows if they have, a gate that needs the two keys turned in which is done with a key press, and it won't open till both have been turned in. I created wisps that teleports you away if you touch them, pillars that move up and down in the lava, and finally, I made a death floor.


With everything laid out, I tested out my level a few times with the current setup, and although it's not that good, it has the feel I'm going for, and once I get to the next week, I will lay it out properly.


Fourth Assignement - All mechanics